PlanetStudio Payment Gateway
HayPost Tracking Add-on
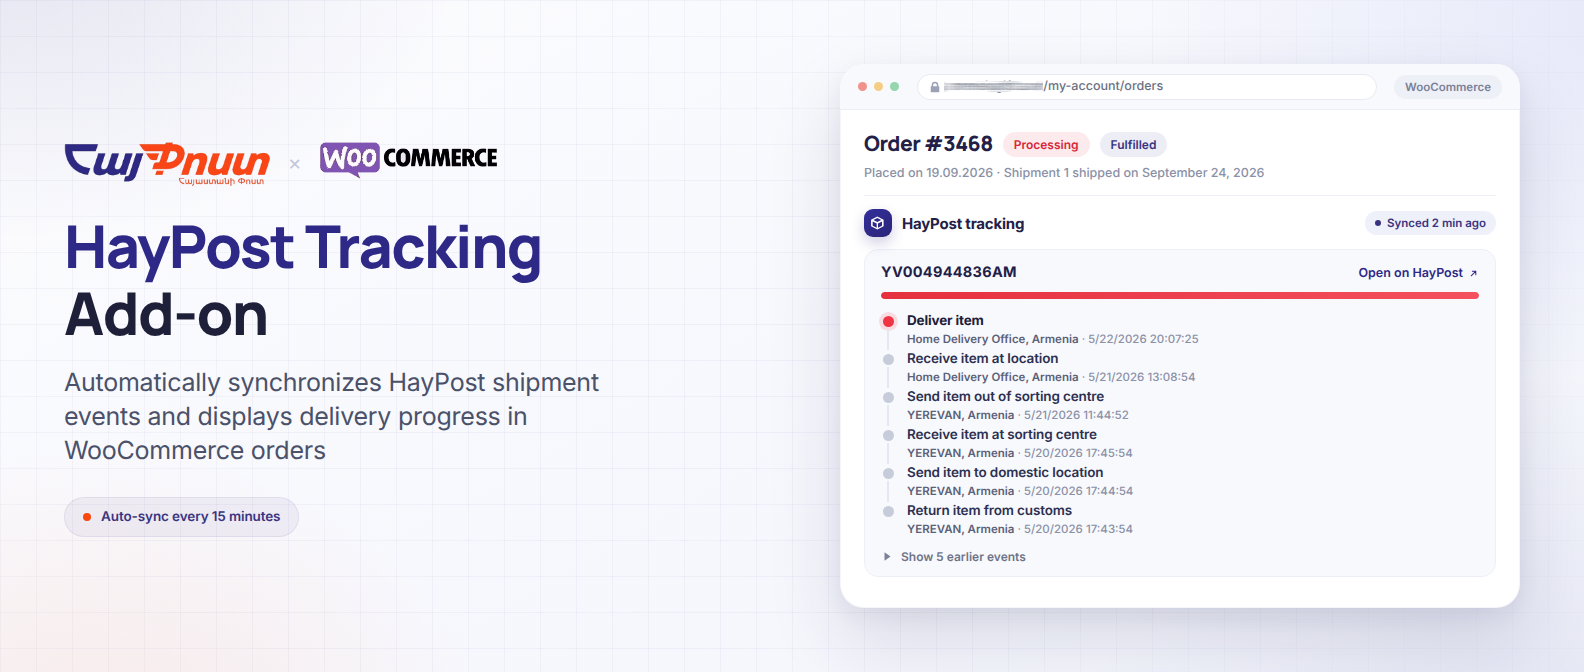
The HayPost Tracking Add-on adds automatic HayPost shipment tracking to WooCommerce.
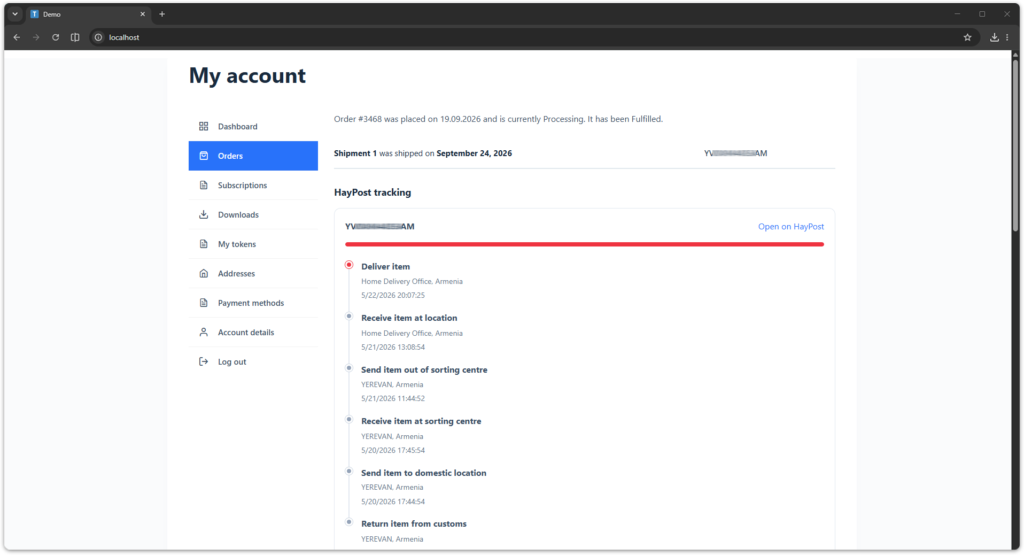
It synchronizes delivery events in the background and shows customers a clear tracking timeline directly on their order page.
The add-on is designed for WooCommerce stores that:
- ship orders with HayPost
- store tracking numbers in WooCommerce fulfillments
- want automatic shipment status updates
- want customers to see tracking progress without leaving the order page
PlanetStudio Payment Gateway Core, WooCommerce, and an active HayPost add-on token are required.
How It Works
The add-on uses the tracking number saved in a WooCommerce fulfillment and requests shipment data directly from the HayPost tracking service.
Tracking flow:
- A WooCommerce order is shipped with HayPost
- A fulfillment is created with HayPost as the shipment provider
- The HayPost tracking number is saved in the fulfillment
- The add-on detects the shipment and schedules synchronization
- Tracking events and delivery progress are saved with the fulfillment
- The customer sees the latest shipment timeline on the WooCommerce order page
- Automatic synchronization stops after the shipment is delivered
Previously synchronized tracking information remains available after delivery.
Requirements
| Requirement | Description |
|---|---|
| WordPress | A working WordPress website |
| WooCommerce | Required for orders and fulfillment records |
| PlanetStudio Payment Gateway Core | Required for add-on management and token activation |
| HayPost Tracking Add-on | The add-on must be installed and activated |
| Active token | A valid HayPost add-on token from PlanetStudio |
| HayPost tracking number | A valid tracking number saved in a WooCommerce fulfillment |
Installation and Activation
- Install and activate PlanetStudio Payment Gateway Core
- Install and activate WooCommerce
- Upload and activate the HayPost Tracking Add-on
- Go to:
WordPress Admin → PSPG → Add-ons
- Find the HayPost Tracking Add-on card
- Enter your activation token
- Activate the token
When the token is active, HayPost API requests, scheduled synchronization, manual synchronization, and the customer tracking timeline become available.
Adding a HayPost Shipment
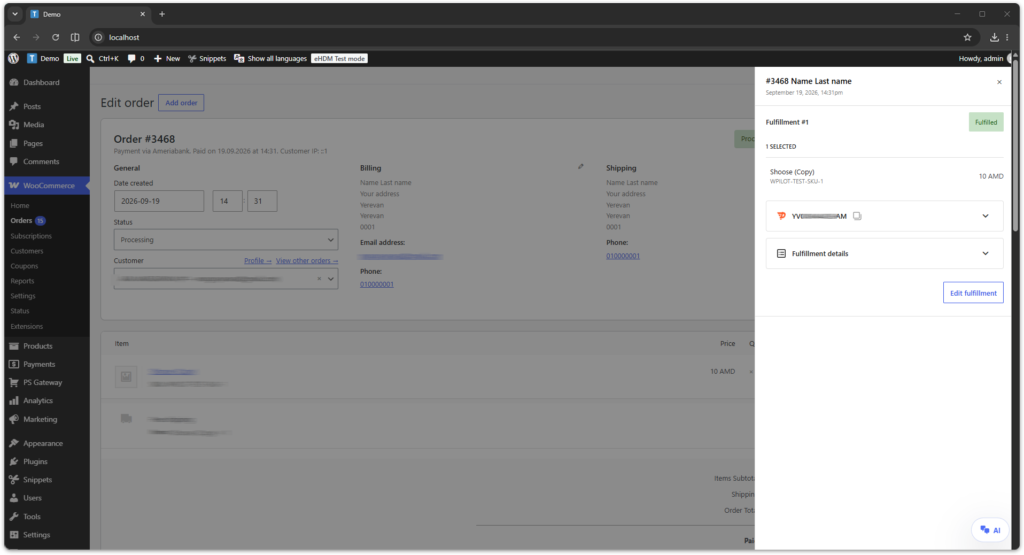
- Open a WooCommerce order
- Create or edit a shipment fulfillment
- Select HayPost as the shipment provider
- Enter the HayPost tracking number
- Save the fulfillment
The add-on automatically detects HayPost fulfillments when they are created or updated.
The add-on does not create shipments or tracking numbers. The shipment must already exist in HayPost, and its tracking number must be added to the WooCommerce order.
Managing Shipments
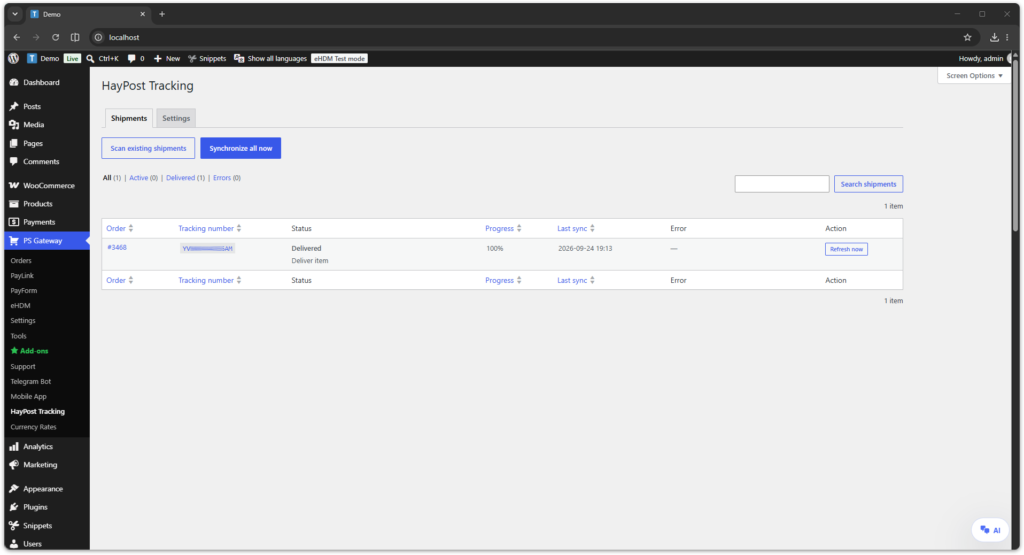
All detected HayPost shipments are available in:
WordPress Admin → PSPG → HayPost Tracking → Shipments
The Shipments table shows:
| Column | Description |
|---|---|
| Order | Linked WooCommerce order number |
| Tracking number | HayPost tracking number with a link to the HayPost website |
| Status | Current shipment state and latest event |
| Progress | Calculated delivery progress |
| Last sync | Date and time of the latest synchronization |
| Error | Latest synchronization error, if any |
| Action | Manual refresh for an individual shipment |
You can search shipments and filter the table by:
- All
- Active
- Delivered
- Errors
The number of rows displayed per page can be changed in Screen Options.
Manual Shipment Actions
Scan existing shipments
Use Scan existing shipments to find HayPost fulfillments that were created before the add-on was installed or activated.
Synchronize all now
Use Synchronize all now to queue all active HayPost shipments for an update.
Refresh now
Use Refresh now in the Shipments table to immediately update one shipment.
Tracking Settings
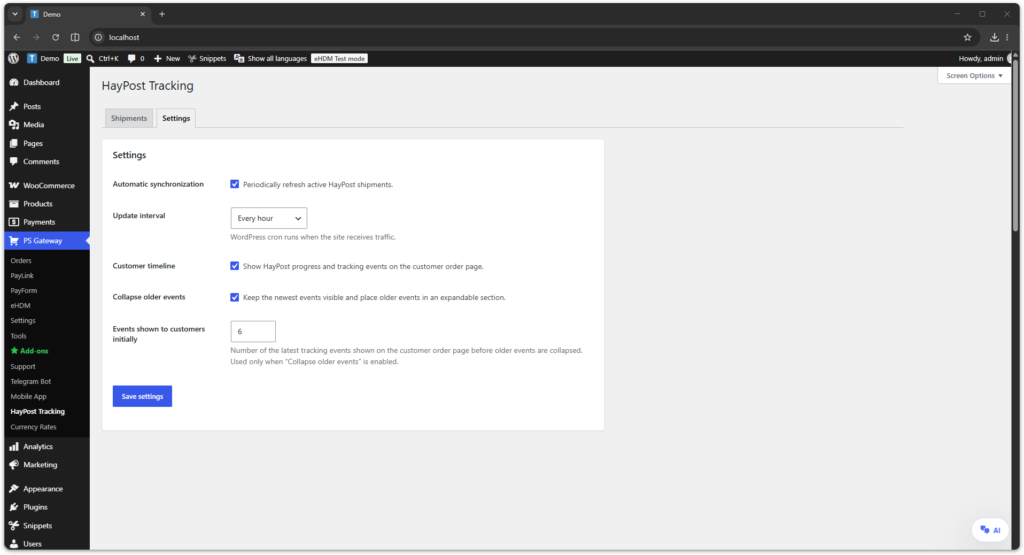
Tracking settings are available in:
WordPress Admin → PSPG → HayPost Tracking → Settings
| Setting | Description |
|---|---|
| Automatic synchronization | Periodically refresh active HayPost shipments |
| Update interval | Choose 15 minutes, 30 minutes, 1 hour, 3 hours, or 6 hours |
| Customer timeline | Show HayPost progress and tracking events on the customer order page |
| Collapse older events | Keep the newest events visible and place older events in an expandable section |
| Events shown to customers initially | Number of recent events shown before older events are collapsed |
Important: WordPress cron runs when the website receives traffic. On low-traffic websites, scheduled updates may run later than the selected interval.
Customer Tracking Timeline
When the Customer timeline setting is enabled, synchronized HayPost information is displayed on the customer’s WooCommerce order page.
The timeline includes:
- tracking number
- link to the shipment on the HayPost website
- visual delivery progress
- latest tracking event
- event location and country
- event date and time
- expandable earlier events
The timeline uses tracking data stored with the WooCommerce fulfillment. If HayPost is temporarily unavailable, the latest successfully synchronized information remains available.
WordPress Dashboard Widget
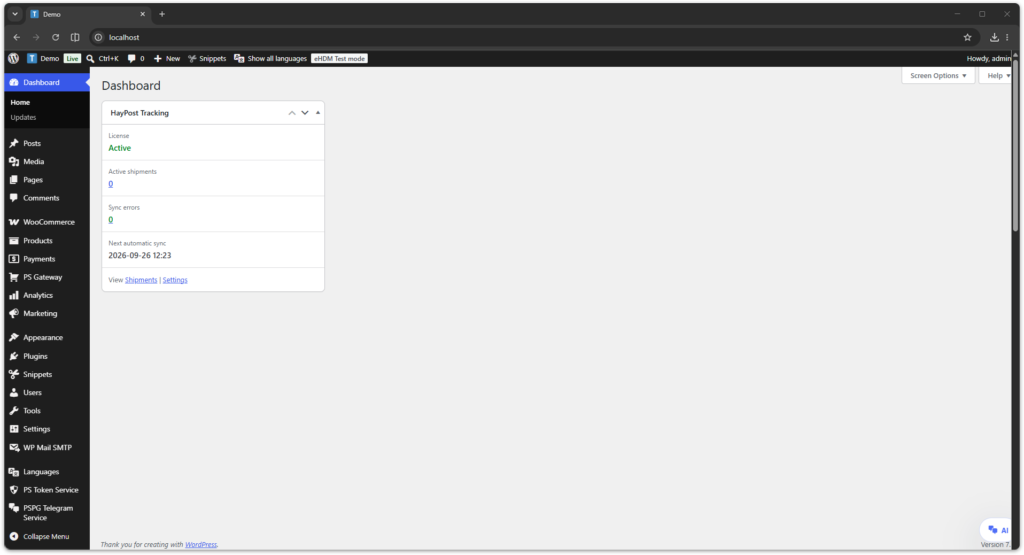
The add-on adds a compact HayPost Tracking widget to the WordPress Dashboard.
The widget shows:
- license status
- number of active shipments
- number of synchronization errors
- next automatic synchronization time
Use the Shipments and Settings links at the bottom of the widget to open the corresponding HayPost administration tab.
Shipment Status and Progress
HayPost tracking events are converted into a clear delivery progress indicator.
Depending on the available HayPost events, the shipment can progress through stages such as:
- Shipment accepted
- Processing or sorting
- In transit
- Arrived in Armenia or customs processing
- Sent to the delivery location
- Delivered
The exact event names and locations are provided by HayPost and may vary between shipments.
Token and License Protection
The HayPost Tracking Add-on requires an active token issued through PlanetStudio.
If the token is inactive or expired:
- HayPost API requests are disabled
- automatic synchronization is stopped
- manual synchronization actions are disabled
- the customer tracking timeline is not displayed
Cached shipment information is preserved and synchronization can continue after the token is activated again.
Troubleshooting
Shipment does not appear in the table
Check that:
- the add-on token is active
- the WooCommerce order has a fulfillment
- the shipment provider is set to HayPost
- a tracking number is saved in the fulfillment
Then open the Shipments tab and click Scan existing shipments.
Shipment is not updating automatically
Check that:
- Automatic synchronization is enabled
- the add-on token is active
- WordPress cron is working
- the website receives enough traffic to trigger scheduled tasks
- the HayPost tracking service is available
You can also click Refresh now to test one shipment manually.
Customer timeline is not visible
Check that:
- Customer timeline is enabled in HayPost Tracking settings
- the add-on token is active
- the shipment has been synchronized at least once
- HayPost returned tracking events for the tracking number
Synchronization error
The latest error is displayed in the Error column of the Shipments table.
Common reasons include:
- invalid tracking number
- shipment not found by HayPost
- temporary HayPost service error
- network connection problem
- inactive or expired add-on token
Need Help?
If you need assistance please contact support:
Support
https://planetstudio.am/support/
Screenshots